Fig. 1
Download original image
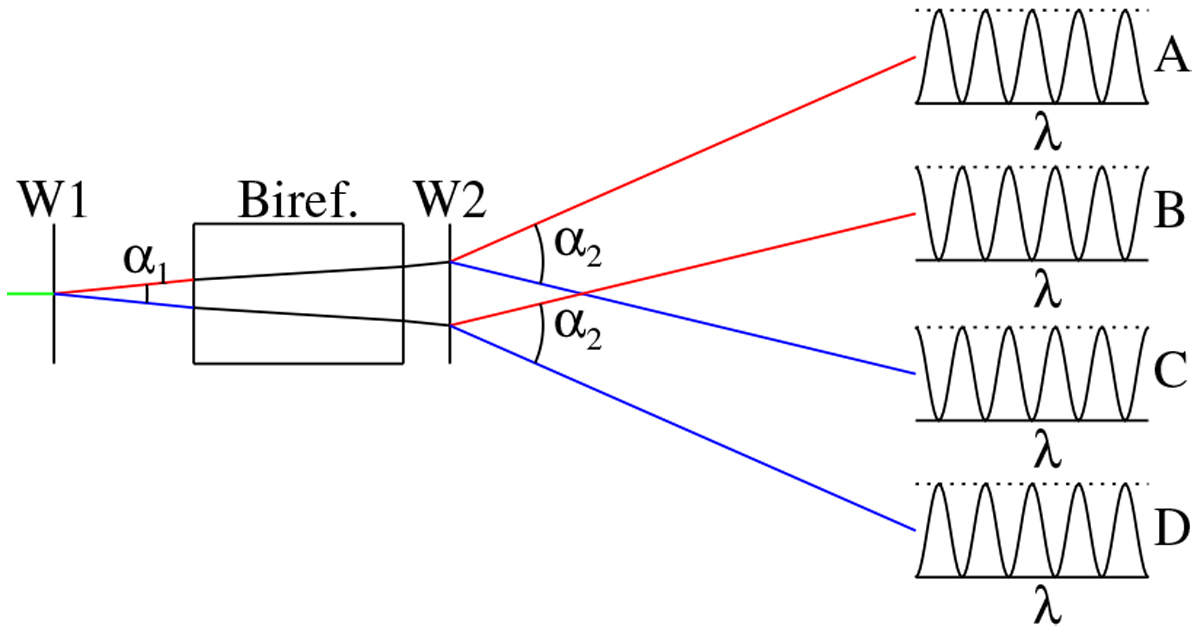
Sketch of the simple design. Unpolarized (green) light enters on the left. This is split into vertically (red) and horizontal (blue) polarized light by the first Wollaston prism (W1). Inside the birefringent element, the polarization of the light depends on wavelength and position. After the birefringent element, the light is split by the second Wollaston prism (W2), with twice the offset angle of the first. The transmissions of the four beams as a function of wavelength are shown on the right. The top (A) and bottom (D) beams are identically modulated. Similarly, the middle two beams (B and C) are identically modulated. For illustrative purposes, the relative distances are not to scale, the angles are vastly exaggerated and are not two-to-one, and only the center ray of each col-limated beam is shown. In reality, the collimated beam would nearly fill the element, the spacing of the rays would be on the order of the fiber diameter, and α2 ≈ 2α1 or α2 ≈ α1/2. For clarity, the Wollaston prisms are spaced away from the element. In reality, they would likely be in contact. Also, they are shown with zero thickness.
Current usage metrics show cumulative count of Article Views (full-text article views including HTML views, PDF and ePub downloads, according to the available data) and Abstracts Views on Vision4Press platform.
Data correspond to usage on the plateform after 2015. The current usage metrics is available 48-96 hours after online publication and is updated daily on week days.
Initial download of the metrics may take a while.